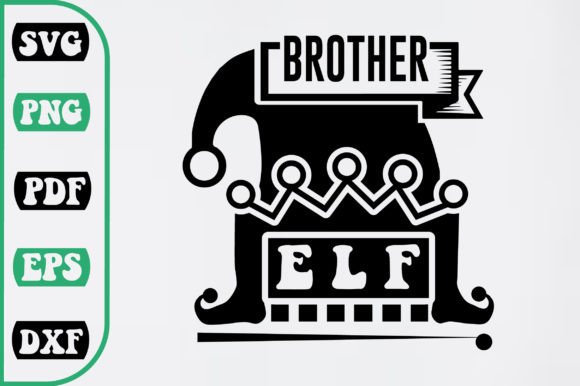
Brother Elf SVG Design: What You Need to Know Before You Start Creating
If you own a Brother cutting machine—especially the ScanNCut or a compatible model—you have likely run across the term "Brother Elf SVG Design." It sounds like a specific file format or perhaps a brand of ready-made cut files. In reality, it refers to SVG designs that are optimized for Brother machines, often with a playful, whimsical "elf" aesthetic or theme. People search for these files because they want charming, holiday-themed designs, fantasy characters, or decorative elements that work smoothly with their Brother equipment. But the path from finding a file to getting a perfect cut is not always straightforward. Many creators, from hobbyists to small business owners, stumble into the same pitfalls that cost time, material, and frustration. Understanding what you are actually getting, how to use it correctly, and what to watch out for can save you from wasted effort and disappointing results.
What Exactly Is a Brother Elf SVG Design?
At its simplest, a Brother Elf SVG Design is a vector graphic file that has been created or adjusted to work well with Brother cutting machines. SVG stands for Scalable Vector Graphics, which means the design is made of mathematical paths rather than pixels. This allows you to resize the image without losing quality—essential for cutting precise shapes out of vinyl, cardstock, fabric, or other materials. The "elf" part typically refers to the subject matter: cute elf characters, elf hats, shoes, or whimsical fantasy elements often used for Christmas crafts, birthday decorations, or storybook-themed projects.
What makes these designs specifically suitable for Brother machines is how the layers, cut lines, and registration marks are organized. A generic SVG might look fine on screen but fail to separate properly when imported into Brother's software. A well-made Brother Elf SVG Design will have clean, closed paths, appropriate line thickness, and clear layer naming so that the machine knows what to cut and what to leave as a sketch or score line. Understanding this distinction is the first step toward avoiding common mistakes.
The Most Common Mistakes People Make
Many users assume that any SVG file will work perfectly with their Brother machine. That assumption leads to wasted material, misaligned cuts, and hours of troubleshooting. Below are the most frequent errors I see, along with practical ways to avoid them.
Choosing the Wrong File Format or Resolution
Just because a file says "SVG" does not mean it is ready for your Brother machine. Some SVG files are designed for web use and contain raster elements, gradients, or effects that do not translate to cutting paths. When you import such a file into Brother's CanvasWorkspace or ScanNCut software, it may appear as a single un-editable image rather than separate cut lines. You might end up with a design that the machine tries to print instead of cut, or that simply fails to process.
What to do instead: Before downloading, look for files labeled specifically as "cut-ready" or "SVG for Brother." Check the preview images for clear outlines and separated layers. If the design has shadows, gradients, or complex fills, it is likely not suitable for cutting. A reliable Brother Elf SVG Design will have distinct, solid-colored layers with clear cut paths. When in doubt, test the file on a small scrap piece of material before committing to your final project.
Ignoring Software Compatibility
Brother machines use proprietary software to prepare designs for cutting. CanvasWorkspace is the most common tool for ScanNCut users, but there is also Brother Design Database and third-party options like Inkscape with plugins. A common mistake is downloading a design that was created for a different ecosystem—such as Cricut Design Space or Silhouette Studio—and assuming it will work without adjustment. The layer naming, registration marks, and even the coordinate system can differ between platforms.
How to avoid this: Look for designs that include a note about being tested in CanvasWorkspace or that provide instructions for importing into Brother software. If a design comes with multiple file formats (SVG, DXF, PNG, AI), the SVG version is usually your best bet, but you still need to check that the paths are clean. Open the file in a free vector editor like Inkscape before importing it into CanvasWorkspace. That way you can see if there are stray points, overlapping lines, or open paths that will cause trouble. Fixing those issues beforehand is much easier than wrestling with them inside Brother's software.
Overlooking Material Settings and Size Scaling
Even a perfectly designed SVG will fail if your machine settings are wrong. I have seen users select "paper" for a design that should be cut in vinyl, or choose the wrong blade depth and speed. The result is either a cut that goes too deep and ruins the mat, or one that does not cut through at all. Scaling is another hidden trap. When you resize a Brother Elf SVG Design in the software, the cut lines scale proportionally, but the registration marks and score lines may not. If you shrink a design too much, intricate details like elf fingers or hat points become too small for the blade to follow accurately, and the machine may skip them entirely.
Practical advice: Always do a test cut with the exact material you plan to use. Brother's software includes material presets, but those are starting points, not guarantees. Adjust blade depth and speed based on your specific material—cardstock, vinyl, and fabric all behave differently. When sizing your design, use the on-screen ruler to check that the smallest details are at least 2–3 mm wide. If a detail is smaller than that, either enlarge the whole design or simplify the file by removing that element. Your finished project will look cleaner, and your machine will thank you.
Downloading from Marketplaces: What to Watch For
Marketplaces like Etsy, Creative Fabrica, and Design Bundles are full of Brother Elf SVG Designs. Many are excellent, but others are poorly made or even stolen. A common red flag is a seller who offers hundreds of designs with generic previews and no sample cut photos. Another is extremely low prices—$1 for a bundle of 50 files often means the designs were quickly traced from low-resolution images and have messy paths. Using such files can lead to jagged cuts, extra weeding time, and a final product that looks unprofessional.
Better approach: Look for sellers who show real photos of finished projects, not just digital mockups. Read reviews specifically about cutting performance. A good listing will mention that the design was tested on a Brother machine, and may even include a link to a tutorial or tips for using the file. If the description is vague or the preview images are blurry, move on. Paying a few dollars more for a clean, well-tested design is worth the time and material it saves you.
Learning to Modify and Create Your Own Designs
Relying entirely on pre-made Brother Elf SVG Designs is fine for many projects, but learning to edit and create your own opens up far more possibilities. The biggest mistake here is jumping straight to advanced software without understanding the basics. People download Adobe Illustrator or Affinity Designer and immediately try to create complex layered elf scenes, only to get frustrated by the learning curve. They end up with files that have unclosed paths, wrong viewBox values, or invisible elements that cause the Brother software to crash.
Where to start: Begin with free tools. Inkscape is a powerful vector editor that works well for creating SVGs. Start with simple shapes—a single elf hat, a shoe, or a star—and practice exporting them with correct settings. Learn what a closed path means and how to check for it. Once you can consistently create a file that imports cleanly into CanvasWorkspace, then move on to more complex compositions. There are many YouTube tutorials specifically about creating SVGs for Brother machines. Focus on those rather than generic SVG tutorials, because the export settings and path requirements are different. This skill will not only save you money on ready-made designs but also let you customize projects for clients, seasonal events, or personal gifts.
Quality Control Before You Cut
Before you load material and press "cut," take a few minutes to inspect your design in the Brother software. Many users skip this step and regret it. Look at each layer individually. Are there any stray dots, extra lines, or overlapping shapes that will cut twice? Does the preview show everything correctly positioned on the mat? Is the design centered and within the cutting area? If you are using a ScanNCut, check that the registration marks are present and correctly placed for your material type. For print-then-cut projects, ensure the SVG includes a clear outline or bleed area that the machine can detect.
One simple habit that prevents disaster: after importing your Brother Elf SVG Design, zoom in to 200% or more and scroll through the entire design. Small glitches that look fine at normal zoom become obvious when you magnify them. Fixing a node that is off by a fraction of a millimeter in the software is trivial; fixing a miscut on your final material is not. This extra check takes two minutes and can save you an entire sheet of expensive adhesive vinyl or specialty cardstock.
Getting the Best Results from Your Machine
Even with a flawless design, your machine's performance affects the outcome. A dull blade, a dusty cutting mat, or incorrect pressure settings will ruin a project that should have been perfect. Many beginners blame the design when the real issue is maintenance. Clean your mat regularly with a lint roller or gentle soap and water. Replace the blade after every few projects, especially if you cut dense materials like chipboard or thick felt. Calibrate your machine if you notice shifting or misalignment. A Brother Elf SVG Design that cuts beautifully on a well-maintained machine may cut poorly on one that has not been cared for, simply because the machine cannot track the paths accurately.
If you are selling finished products, consistency matters even more. Test your setup with the exact design you plan to sell, using the same material and settings. Photograph the result from multiple angles. That way, if a customer later reports issues, you can compare their photo to your test and identify whether the problem is in the file, the material, or their machine. This kind of documentation also helps you improve your own process over time.
The Bigger Picture: Why Attention to Detail Matters
Brother Elf SVG Designs are a gateway to a wide range of creative projects—custom gifts, party decorations, clothing embellishments, and even small business products. The difference between a hobbyist who struggles and one who produces consistently beautiful work often comes down to the details: checking file compatibility, testing materials, maintaining equipment, and learning basic vector editing. These steps seem tedious at first, but they quickly become routine. Once you internalize them, you can focus on the fun part—designing and making things you are proud of.
If you are just starting out, give yourself permission to make mistakes, but learn from each one. Keep a small notebook or digital file where you note which settings worked for specific materials and which designs gave you trouble. Over time, you will build a personal reference that speeds up every project. And when you see a stunning Brother Elf SVG Design online, you will know exactly what questions to ask before you download it, import it, and bring it to life on your cutting mat.